CMS Version 8 User Guide
- Go to https://nova.cascadecms.com/ and enter your current SharkLink ID (username) and password.
- Click the "Login" button.
Note: If you are unable to log in with your current SharkLink ID and password, please submit a "Web Content" request through the OIIT Project Support Form for password assistance.

Dashboard Overview
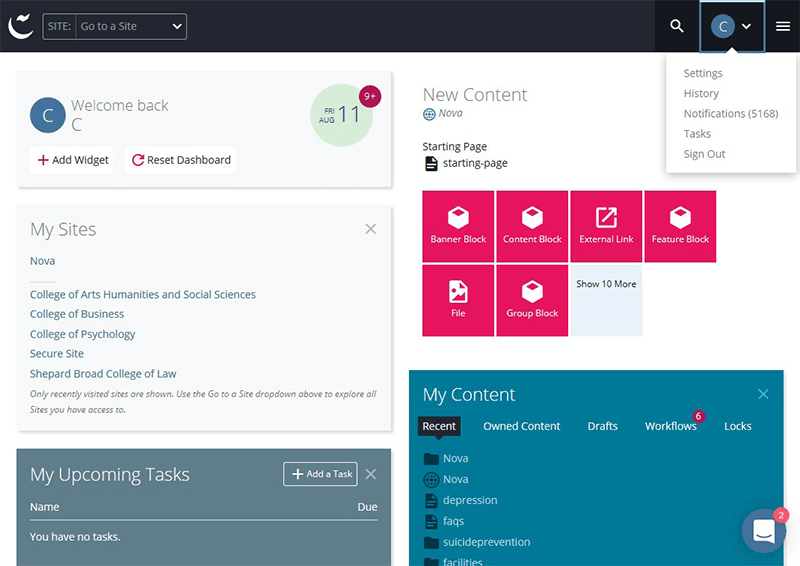
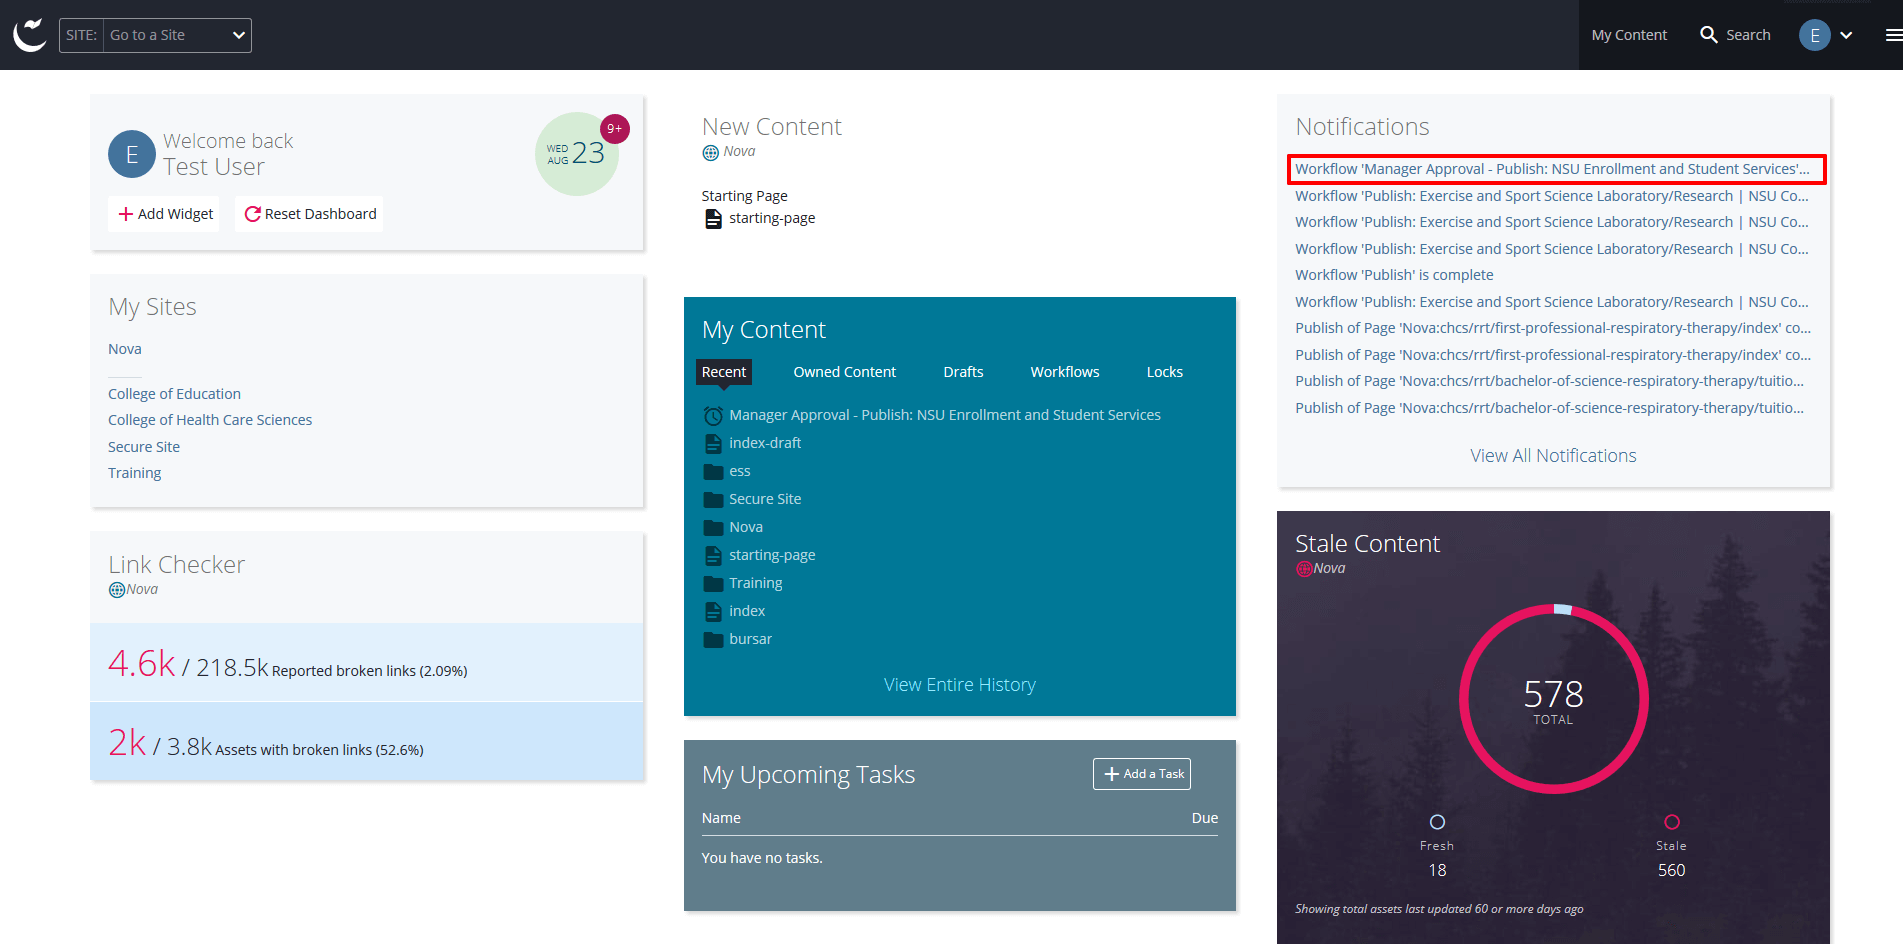
The Dashboard, or Home Area, appears after logging in and is a one-stop place for the creation and management of your content, with movable widgets to set your own personal workflow.
The Dashboard can be reached at any time by clicking the Home (![]() ) link on the dark menu bar at the top left.
) link on the dark menu bar at the top left.
Personalizing Your Dashboard
Based on your role within the CMS, you may determine that certain dashboard widgets are not needed. In this case, hover your cursor over the widget then click on the 'X' icon on the right of each widget to remove from your personal dashboard. If you remove a widget in error, you may add it back at any time by clicking the "+ Add Widget" button at the top left of the dashboard screen.
If you feel that certain widgets need to be higher on the dashboard or just reordered to your liking, hover your cursor on the header title of the widget until a move (![]() ) cursor appears, then click and drag the widget to the desired position.
) cursor appears, then click and drag the widget to the desired position.
Personalizing Your Account Settings
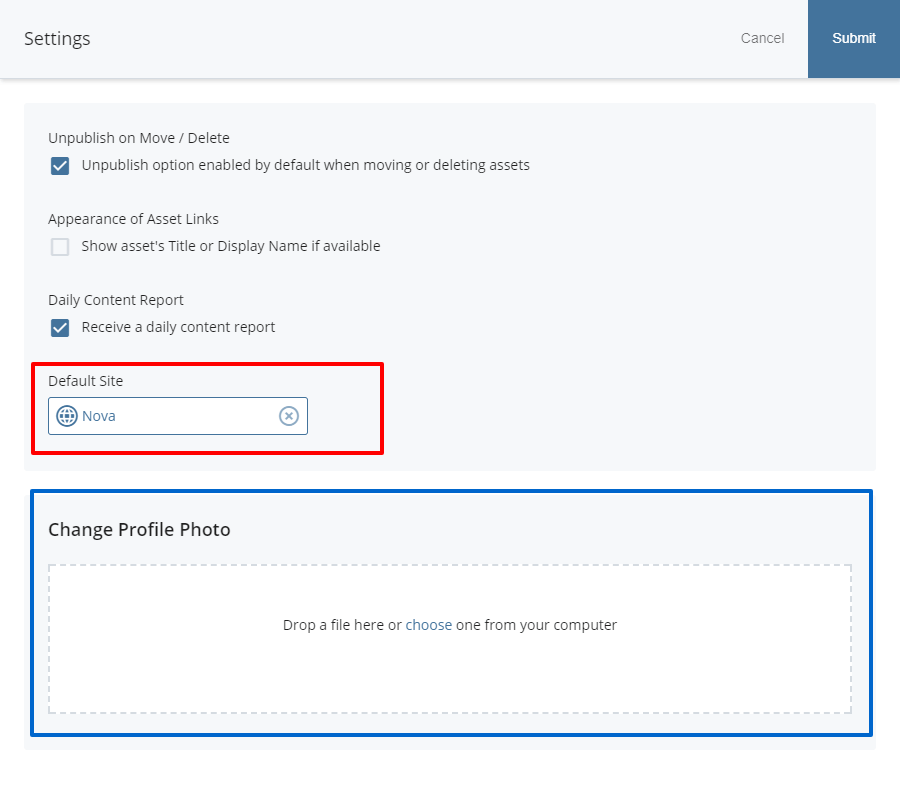
Clicking on your user icon at the top right of the dashboard will allow you access to "Settings." Your account settings provides you with a couple of personalized options:
-
Change Profile Photo - Use the browse or drop area to add a photo. Pictures are helpful for identifying other users in conversation threads.
-
Select a "Default Site" - The site selected will be pinned to the top of the "My Sites" listing.
-
View site assets by title or display name instead of the filename (not recommended).
-
Subscribe to Daily Content Report - A daily email summary of your action items, content updates, and content health alerts across all of your sites.
An asset is any entity within the system that can be used to generate content. For ease of classification, assets are divided into several different groups:
 Page
Page
 File- may be an image, PDF, Word document or any other static content.
 Block - a "pluggable” piece of content that can be easily substituted into any page region and may be utilized for repeating content across several pages.
 External Link (symlink) - an asset that points to a webpage outside the system.
 Folder
-
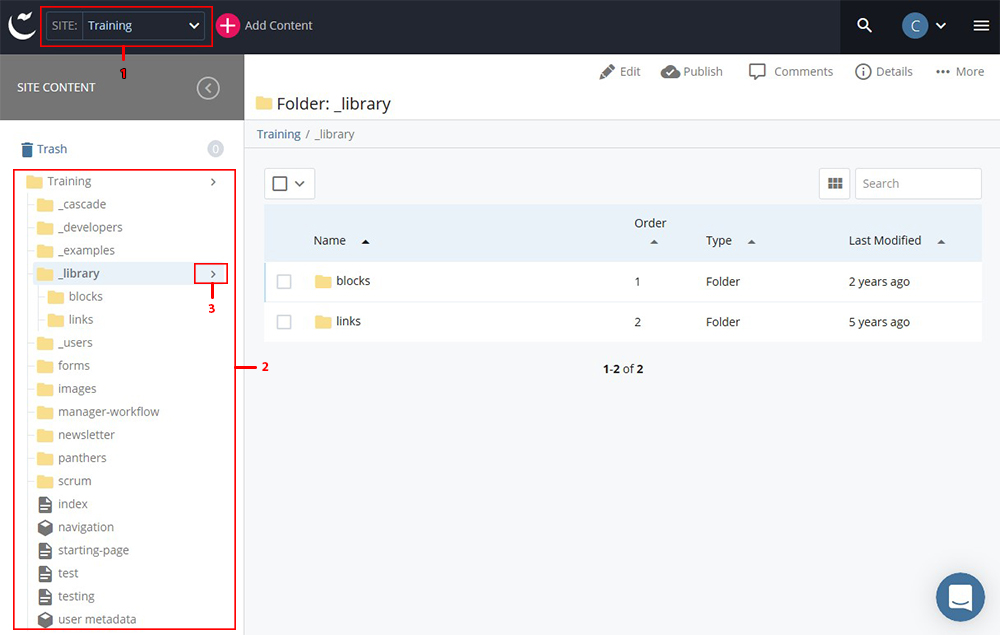
Confirm that the Site dropdown box, located next to the Cascade Server logo, is displaying the correct website. If not, click the arrow to choose the correct website.
-
To the left, you will see the "Asset Tree," where you can locate the folder that corresponds to your department.
-
Click on the folder to expand or collapse its contents. Click the > icon to the right of the folder title to view the folder contents in the main view.
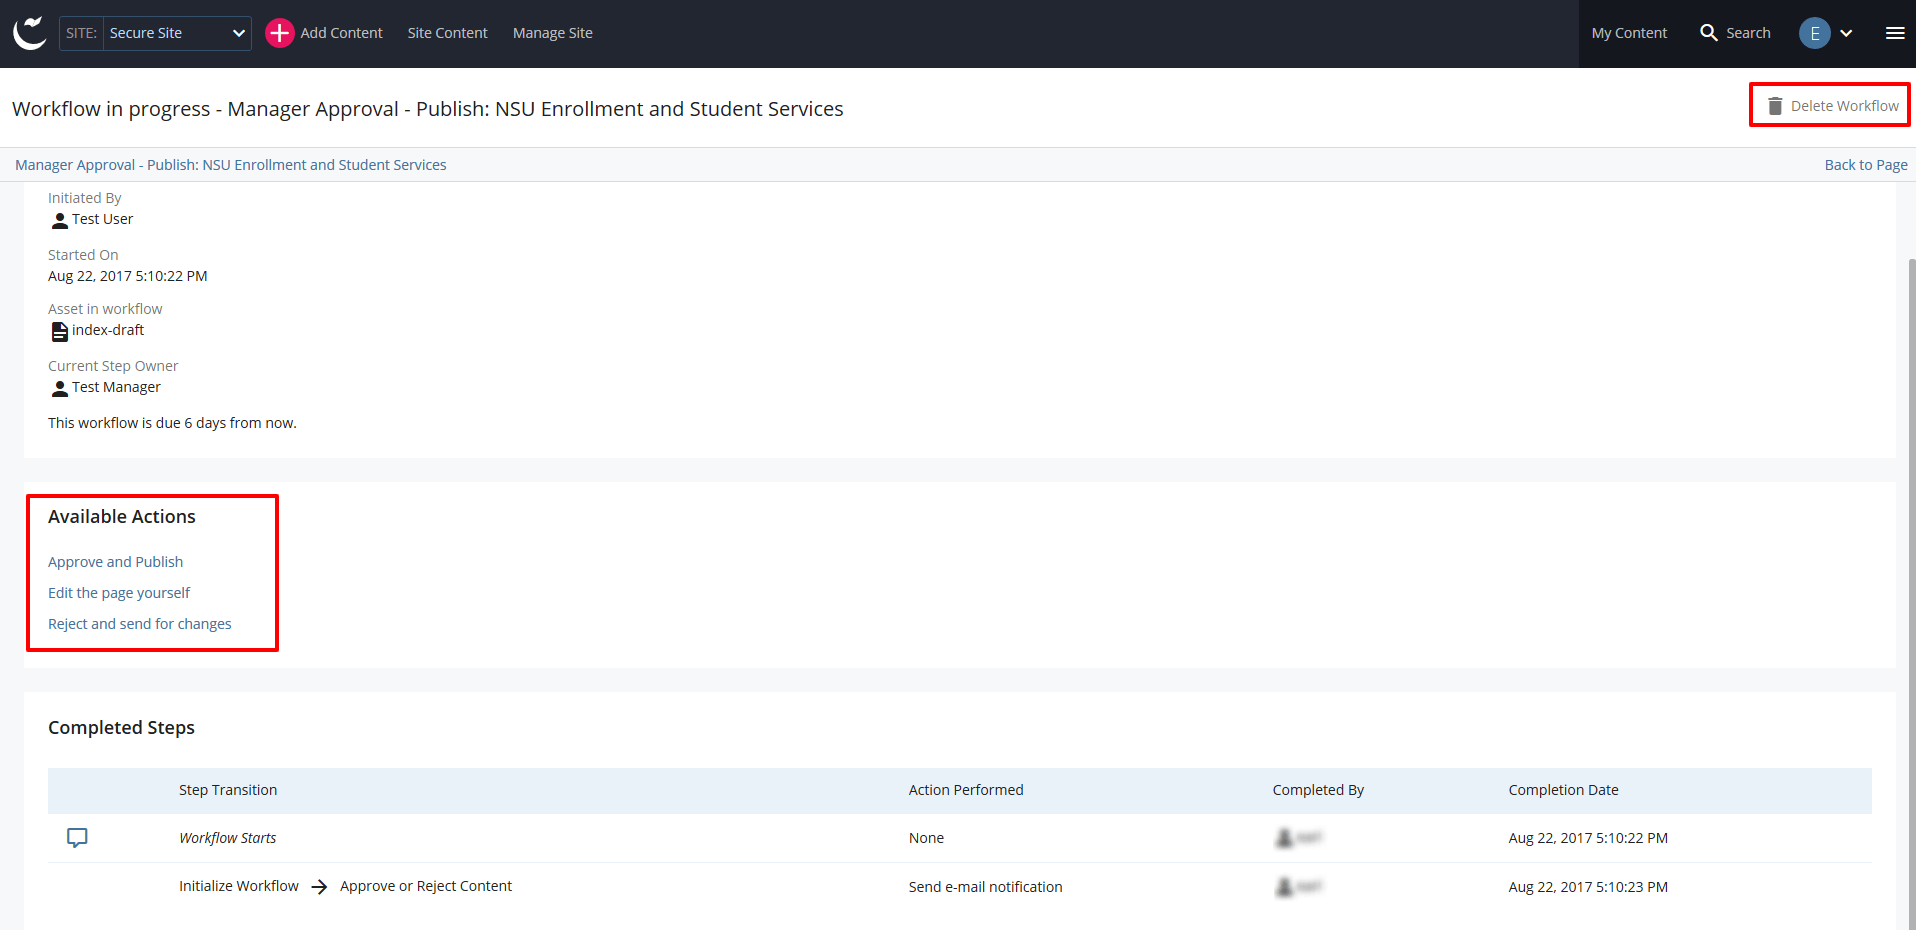
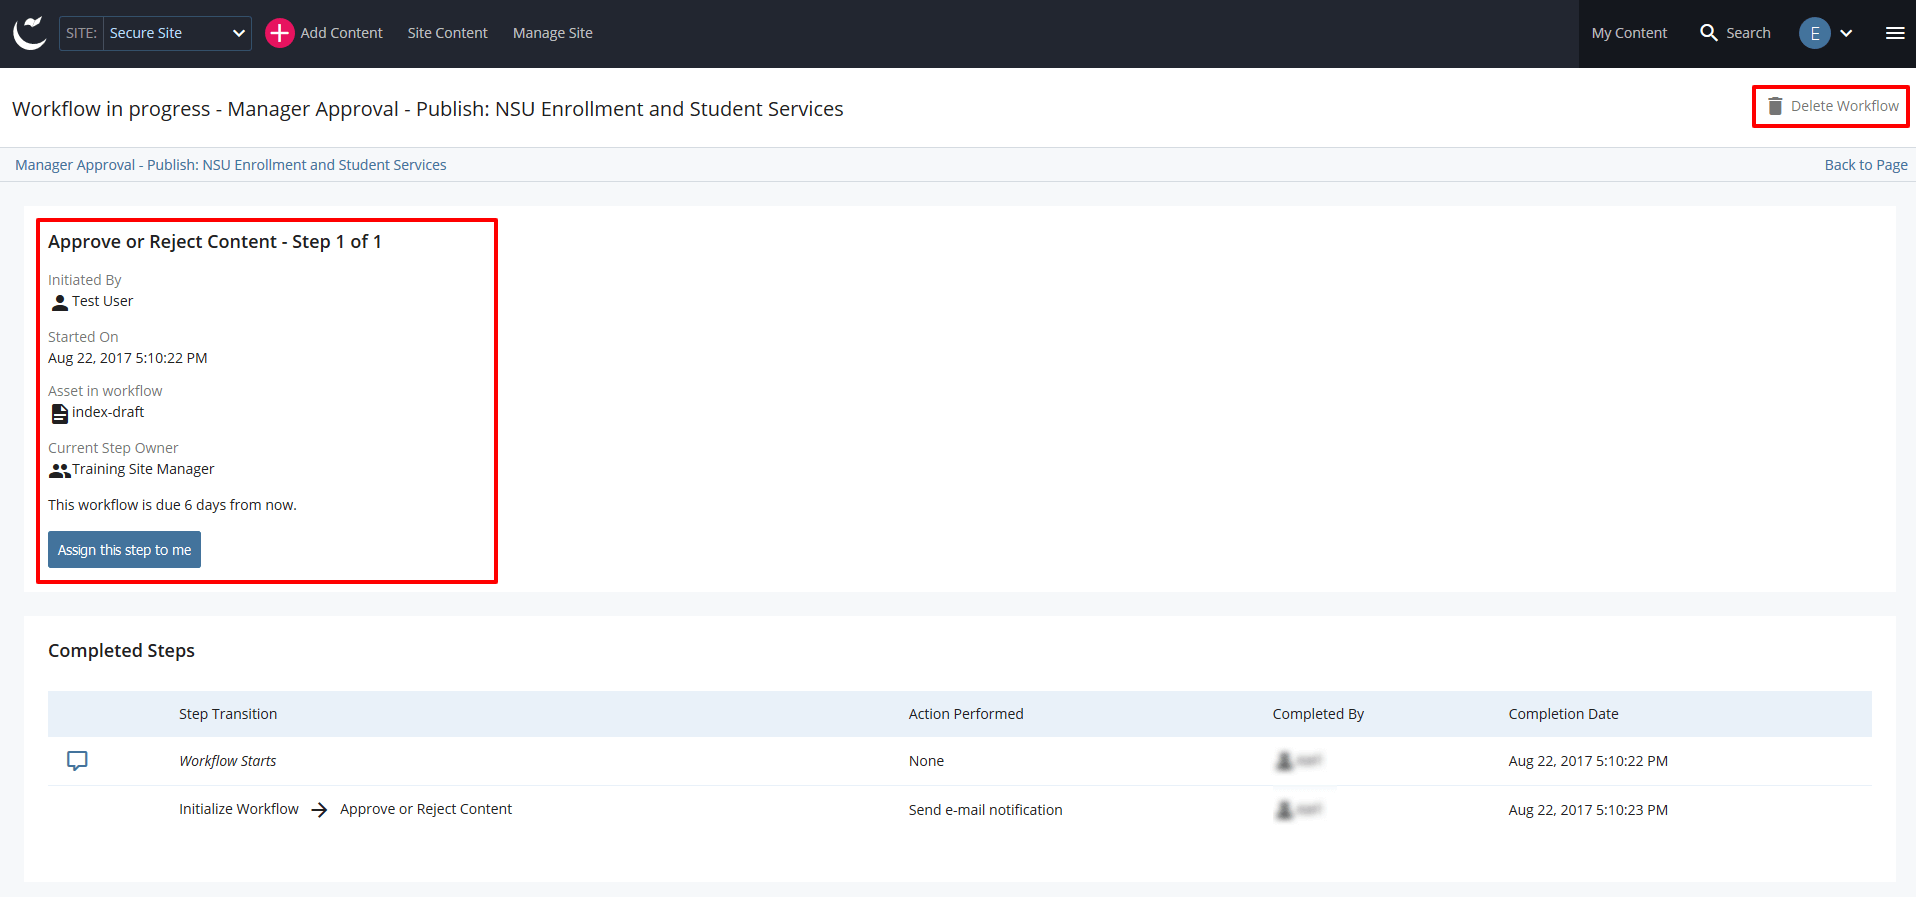
A workflow is a series of ordered steps that assets (files, pages, images, etc.) must go through to be quality-checked, approved, modified, or disapproved by the appropriate system user (Site Manager).
Web sites that have assigned the Site Contributor role to a user will primarily be using system workflow. While Site Managers may submit their own work without the need for workflow, they will still play a part in the review/approval process for Site Contributors.
Users are no longer able to create drafts when an asset is currently in workflow. All new assets (including copies of existing assets) will not become available for use (link to file or page, insert an image into existing page, etc.) until the Site Manager has approved the workflow.
Workflow Process
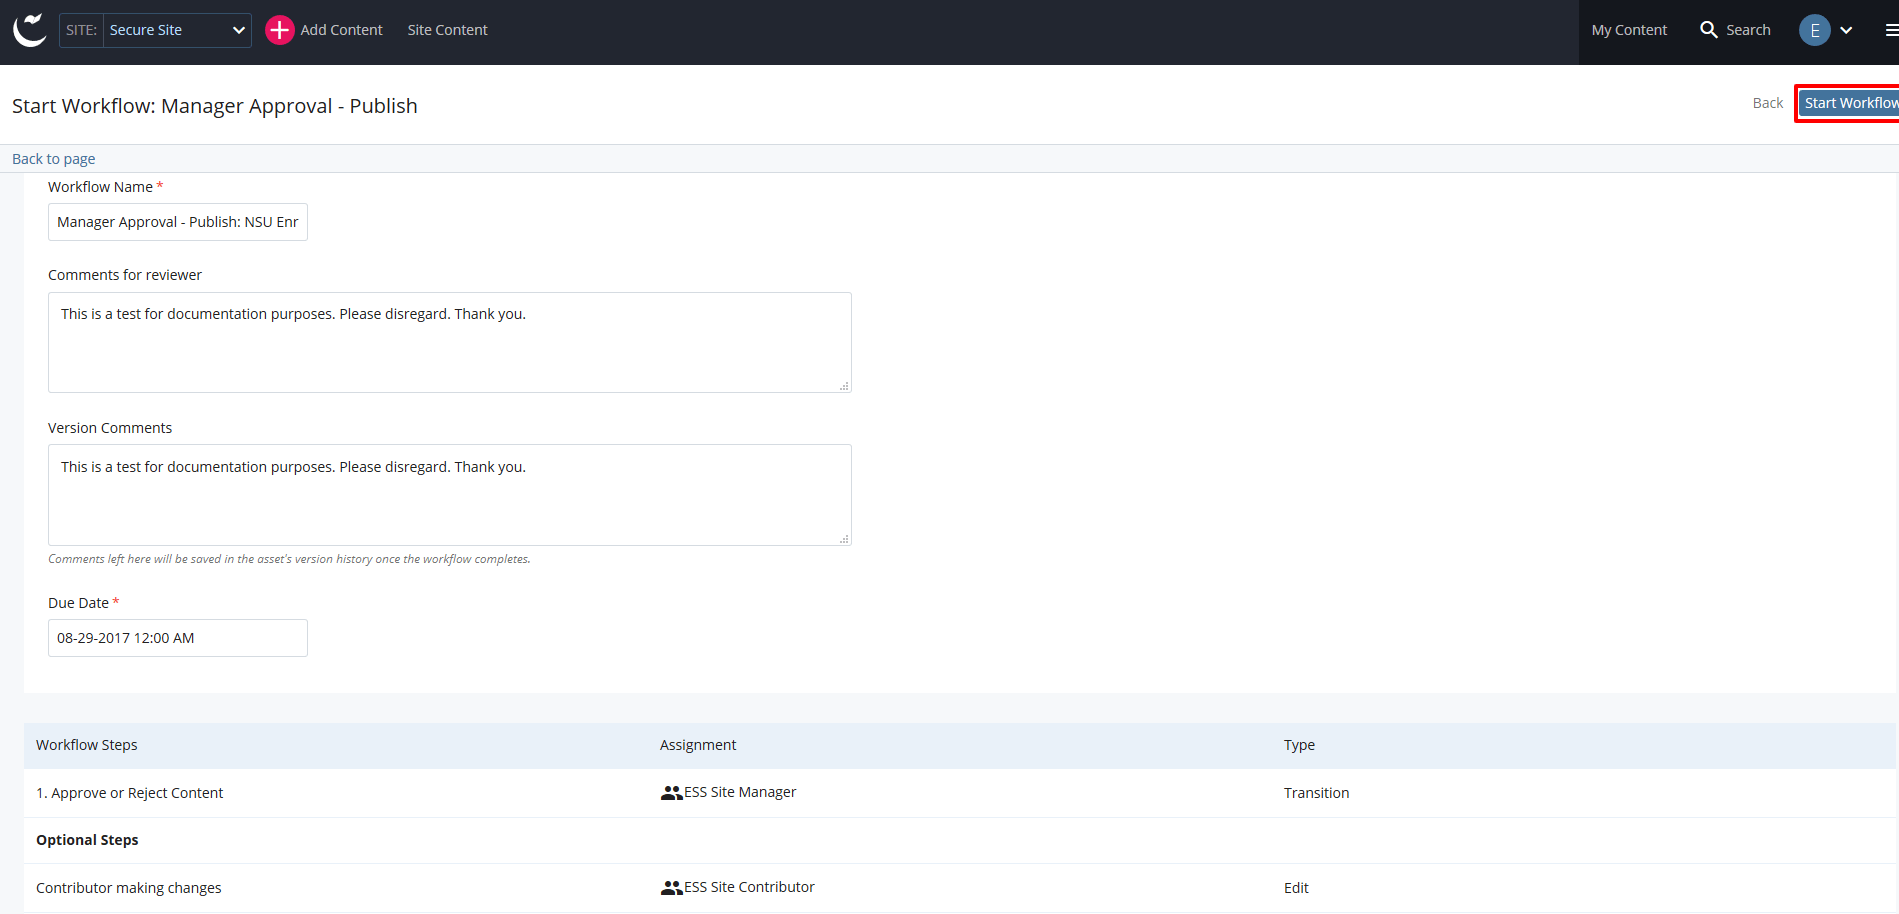
The university has created a standard one-step-approval process (Site Contributor to Site Manager). The workflow process contains ordered steps and some optional steps depending on the action taken by the Site Manager who took assignment of the workflow.
-
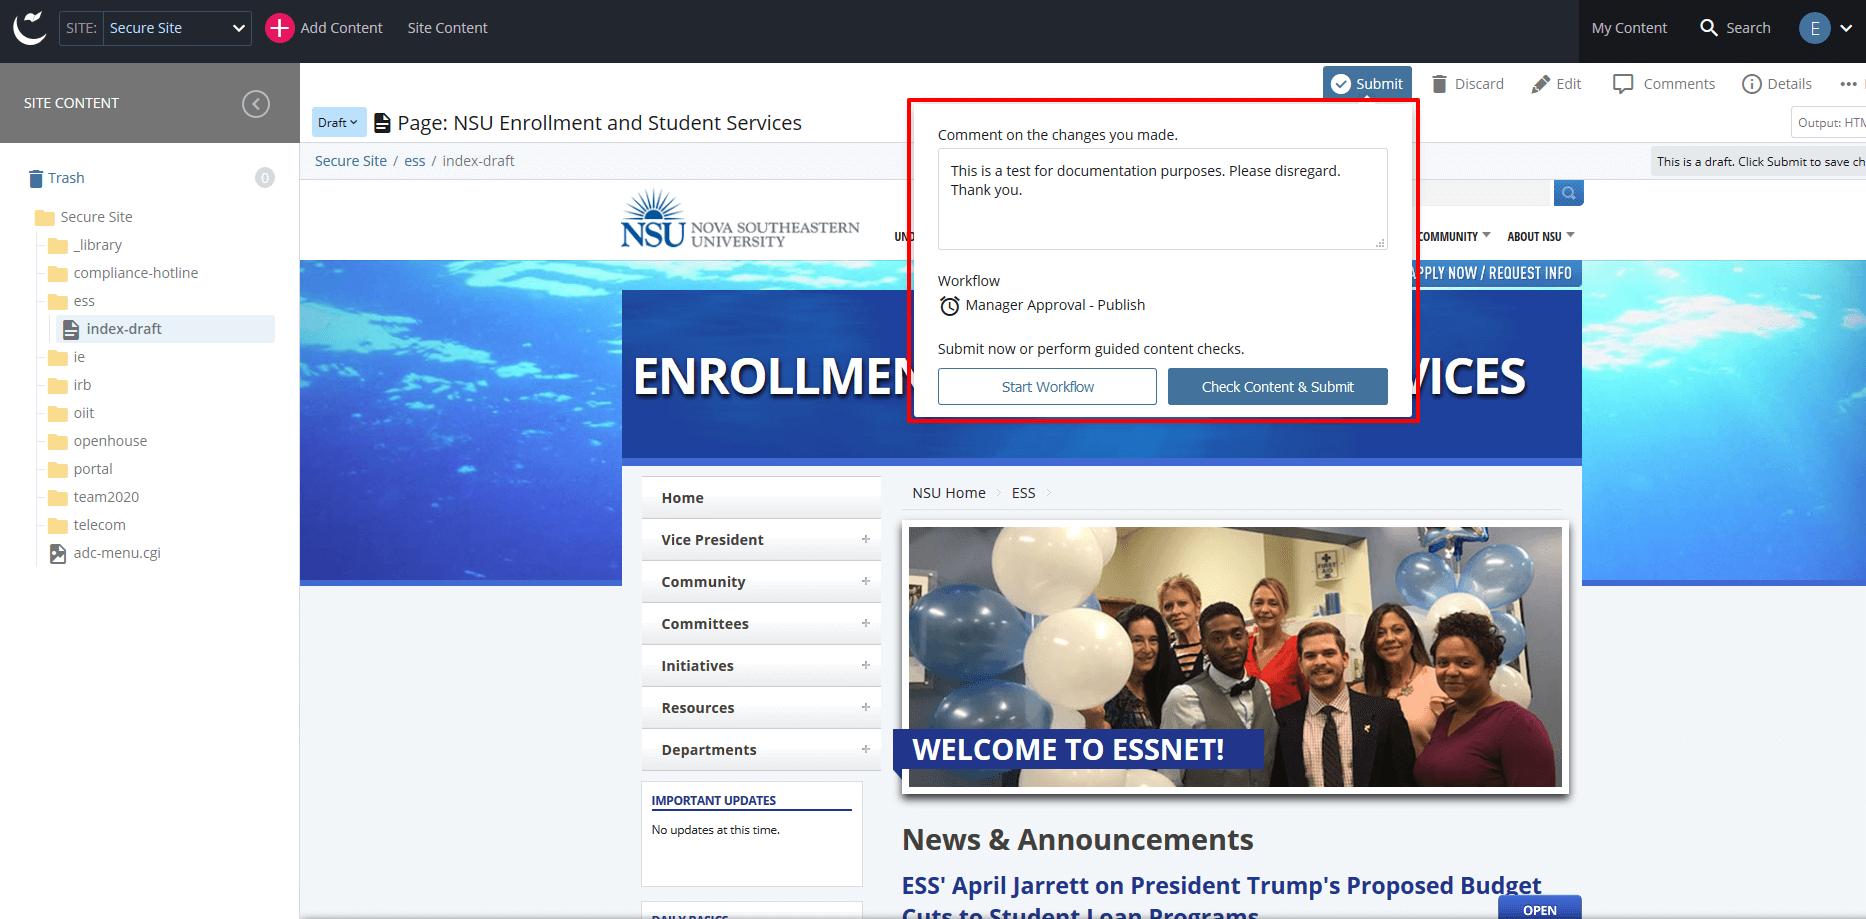
Site Contributor initializes workflow by submitting a new or changed asset.
-
Site Manager takes ownership of submitted workflow by selecting the "Assign this Step to Me" button.
-
Site Manager reviews content, may modify the page themselves, then must choose one of the following actions:
-
Approve and Publish - If Site Manager approves the content from the Site Contributor, the content will be published to the site and available for others to use within the CMS.
-
Reject and Send for Changes - If Site Manager rejects content from the Site Contributor, the workflow will be sent back to the original requestor for further editing.
-
Workflow Comments
When submitting workflow, Site Contributors should fill in the comments section of the workflow to give Site Managers a description of the use of the new asset or change made within the existing asset.
Site Managers should leave comments to describe the changes that need to be done to help the Site Contributor know what should be changed or corrected prior to sending back for review/approval.

Workflow Notifications
Workflow notifications will be received via your NSU email address. Direct actions can be made from within the email via personalized hyperlinks to the system. Upon login, you are greeted by a personalized dashboard, which provides an area to review active workflows or workflows waiting to be assigned.
For any questions on web site updates, please submit a 'Web Content' request through the OIIT Project Intake and Support.